
Space Pioneers: Build bridges between the worlds to connect and lead the cultures!
This is a post-mortem of our entry in the 72-hour-jam of Ludum Dare 30, titled “Space Pioneers”. Try the game for yourself – it’s available for Windows, Mac, Linux and Android!
This post is a summary of how we worked on the game as a group and also a more in-depth look at some of the issues I worked on. As opposed to my first two game jam games, AMazeThing (for Ludum Dare 27) and Clash of Duty: Medieval Warfare for Global Game Jam 2014, I was for the first time not in the role of creating assets. Even though I was really happy with that role in previous game jams and have learned a lot from those jams, I was also itching to apply my programming skills. So it was very fortunate that we had two students specialized in media production who thought up a workflow for sculpting, modelling and texturing the assets in the game.
Interpreting the theme
For LD30, the final theme was “Connected Worlds”. This was the third Game Jam we ran at our lab at university, and we have established by now that we start with a breakfast (in Germany, Ludum Dare’s start time is 3 in the morning) which serves as an informal information exchange about the theme. Following this exchange, we invite people to go into groups and brainstorm ideas. These ideas are then presented to the whole plenum and everyone can give feedback. After this presentation, the “final” groups are formed based on the interest of the members.
The idea finding for my group started out from several similar ideas that seemed like they could be well merged. The starting point was to interpret the theme as connected planets/cultures that have an effect on each eather.
My initial idea was to have a game where one ore more planets are displayed, and you as the player have control over some conditions on the planet, for example, you can speed up or slow development or make global influences on the cultures. The goal was then to influence the planets in such a way that a certain result is reached. The gameplay was intended to be turn-based, so that after each turn the interactions between the cultures would be simulated. For example, if a warrior-culture was allowed to travel to a friendly, low-developed planet, it would destroy the other culture or throw it back in it’s development. We merged this with other ideas by the team members and came to the game design as it stands, where the only interaction is deciding which connections between planets are buillt.
Another idea that came up relatively early was an enemy culture that was uncontrollable by the player and which evolved aggressively and hat to be defeated in order to win the game. This was influenced by the arcade game Sinistar which has a similar idea.
Setting up the project
We quickly decided to use Unity. Since the team was interested to give the then-new Unity GUI in the 4.6 beta version, we decided to go for this version. Version control was realized by Git. In principle, this worked fine, however, our git ignore file included some generated project files which proved to be a nightmare during merging. So before you start working with Git and Unity, make sure your ignore file is complete! Apart from this, we had the common problem that scene files are binary and cannot be merged. We had several succesful workarounds for this. For one, each team member had a personal scene where he tested his own work. For some GUI components, I tried to make sure that as little as possible had to be configured in the scene itself. For example, the UI elements created their own canvas and spawned the necessary UI elements themselves. This is not a pattern I would use in a larger project, but in a setting such as a game jam, this proved to allow us to cooperate quickly.
Workflow
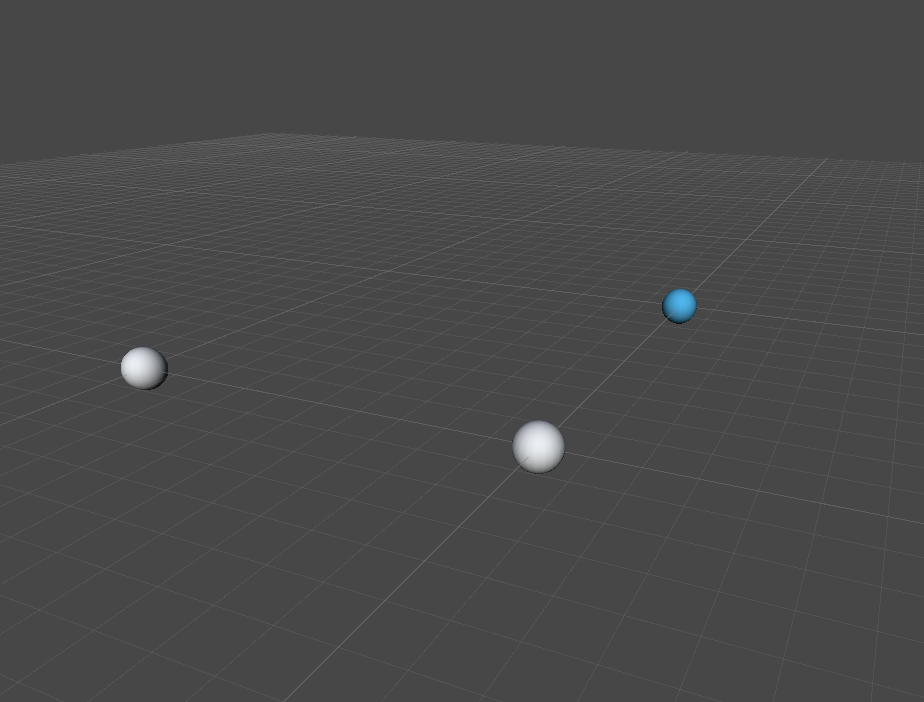
From humble beginnings… (noon of day 1)

… we got to a point where we could try the game for the first time. (noon of day 2)
We were pretty quick in getting the basic game up, with planets as spheres and debug outputs what was happening. From this state, we branched out into each person’s specific area that we had distributed. For example, one team member was working on procedural content generation, two on AI, I was focusing on the user interface. Like in other jams, we were somewhat lucky that we managed to synchronize without making the synchronization between us explicit. In the end, the whole game came together only on the last day. In future jams, I really want to work more towards making the game testable early on.
What worked really well was that our artists were trained in Unity. First, they knew how to get assets into Unity and what worked and what didn’t. Second and even more important for the cooperation, they packaged their inputs as assets and comitted them to the repository themselves, which turned out to be really great. They also wrote their own shaders such as a rim shader and a shader for building the bridges (see more info below) and uploaded them as well.
User Interface

The first steps towards the GUI and the interactions.
I was working on large parts of the user interface and the interaction with the game. As described above, we tried the Unity 4.6 beta. This had some advantages and disadvantages. The UI itself is nicely done, since Unity bought the person behind NGUI, it comes as no large surprise that the system is similar. This makes a lot of tasks easier. Disadvantages were the low state of the documentation. I had worked with NGUI before and was able to find out how the system worked quickly, but other team members had much more problems with finding information on the GUI. A negative point was that the beta version of Unity required a beta player for the web player, which restricted our testers to other developers who had 4.6 installed. Our group had little problems with the stability of the GUI, but other groups at our lab had problems with bugs or undocumented features.
For the selection of planets, I planned to have an overlay over the planet that showed which planet was selected. For this, I created an image of a circle. The plan was then to display this image as a sliced sprite, which would have allowed the circle to be resized. This proved to be not 100% doable with the system, since the circle came out slightly squashed since the system reserved some space in the center of the circle. While the final bridge drawing was not yet implemented, we just drew lines for the bridges. You can find a lot of posts online asking for how to draw simple lines in Unity, the new GUI adds a new way, you could add a simple image of a line and use the sliced sprite functionality to resize the line. This allows for nice stylized lines with a bevel or other effects.
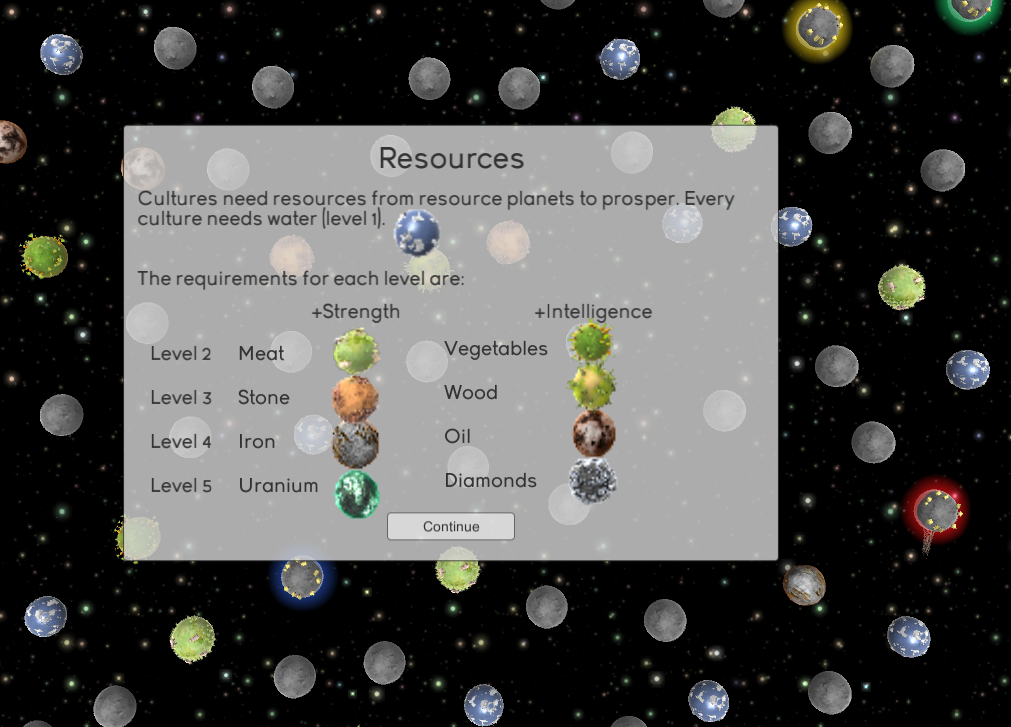
The tutorial of SpacePioneers
The UI turned out to allow us to build GUIs much more quickly than the previous UI system, for example, the tutorial was built in approx. 90 minutes at the end of the development time. One thing is to watch out for is where UI elements are anchored, we had one panel of the tutorial that was at a fixed position and was not visible in some resolutions.
Dragging Bridges
The bridge building system was created by a strike team of two computer scientists and one of the artists on our team. The bridge is built out of a start and end piece and a repeatable intermediate piece. The idea is similar to the sliced sprites of the new GUI: For a specific length of a bridge, take the fixed size start and end piece and repeat the intermediate piece. To resize the bridge to slightly different sizes (smaller differerence than the length of the middle piece), you can scale the whole bridge along it’s length to fit exactly.
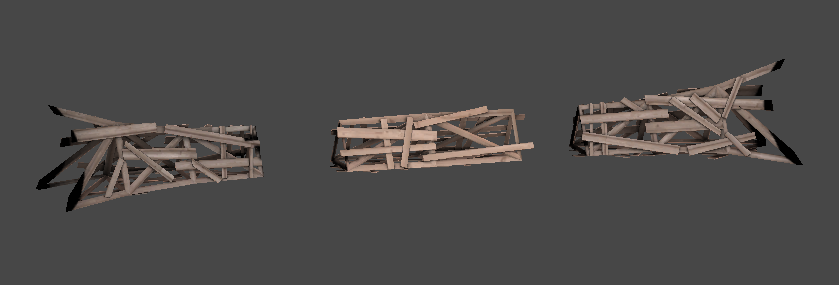
The start, middle and end parts of the briges.
During building, the bridge parts are slowly shown, so that it appears that the bridge is slowly being built. My job was getting the bridge system to work with dragging and dropping, so the user can decide where to build the bridge. For this, I took the existing code for building a bridge and repeatedly called it during dragging, capping it a the minimal and maximal length and snapping it to a planet when it is hovered over. The building code was efficient enough to just call it over and over again.
Visualizing the area of influence

The convex hull algorithm in action.
This was a small experiment I did for making the growth of the enemy in the game more visible. The idea was to show the area of influence of the enemy culture. The algorithm works like this:
- All planets of the enemy are placed in a set.
- We compute the planets that are on the convex hull of the set using the gift wrapping algorithm.
- This convex hull is triangulated and converted to a mesh. For this,
- This mesh is scaled slightly to make the area of influence a bit larger than the convex hull. The scale is applied from the center of mass of the mesh.
- The mesh is rendered on the height of the planets’ center with a semi-transparent material.
This looked nicely, but turned out to have some flaws. First, the scale meant that the area of influence would jump slightly when the mesh was updated, as the center of mass would change. Second and more importantly, the convex hull meant that sometimes, planets that are neutral or even belong to other cultures would be included in the region. This led to this idea not making it into the final game. I have looked the problem up for a bit and found some good resources. This problem is basically to draw a non-convex hull of a set of points. For humans, this is intuitive, as it is similar to the border of a city. However, as you can see from the following diagram, this is a very ambiguous problem, and there exist several approaches in the scientific literature. One excellent source of information is this paper, in which several algorithms are proposed. For example, a Voronoi Diagram of the planets could be used. However, this would not have been possible to implement in the time frame of the jam, so it was discarded.
You can download the script that handles the convex hull here. I might at some point go back and build a cleaner, complete demo where I also add a non-convex hull.
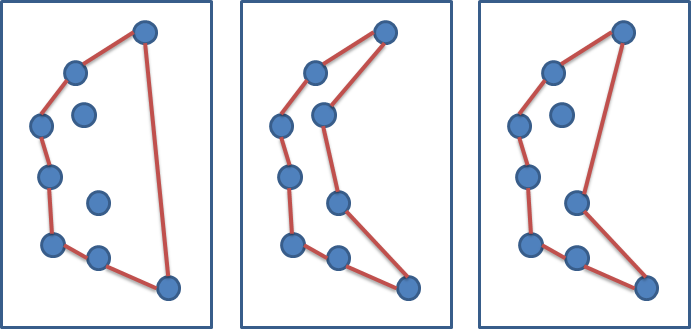
Left: Convex Hull – Middle and Right: Non-Convex Hulls
Android deployment
I was also in charge of bringing the game to Android. Setting up using Unity was super easy, most of the interaction worked out of the box. The only two areas that needed some adjustment were zooming using pinch gestures and dragging using the finger. For the zooming, we used code from the Unity Wiki.
Dragging was more interesting, since our graphics department needed a perspective camera to make the rim shader work. There was little input on the web for how to correctly set up panning in this way using a perspective camera. The correct advice is given in this post. The idea is to be able to project the touch position into world position. This is done by projecting the touch position from the screen onto the plane where the content (=planets in our game) lives. Then we take the difference between the world position of the previous touch/click and the world position of the current touch. Note that both are calculated from the same camera settings. The result is a vector that we add to our camera position, and we are panning correctly at all zoom levels.
Final words
Again, this game jam was a very nice learning experience, getting a complete game together as a team in a very short timeframe. It was very motivating to have trained artists on the team, as the game was looking very nice very quickly. Also, getting the first jam game on a mobile platform in a very short time was a nice experience. For me, game jams are always a mixture of learning, experimenting and getting the things done. It’s important to think about what you are doing at each point in time and what you want to achieve. If you use it as a learning opportunity, it will take longer, but you have the chance to learn something new. Experimenting can lead you to new problems (for me, it was very interesting to see that the small experiment with the area of influence led to a current problem in computer graphics) and might have to be discarded. And sometimes you will have to sit down and get the game working before trying out the “fun” stuff.
I’m definitely looking forward to the next game jam!